project: bedroom makeover

I updated on changing our bedroom carpet back in May, and exactly zero has changed since then (with the exception of purchasing this chair). I tend to abandon designing our master bedroom until the very end because it's the least visited room when we have guests, but I'm tired of living in a mismatched mess, so it's been moved up on my priority list. Here are my current plans for the space:

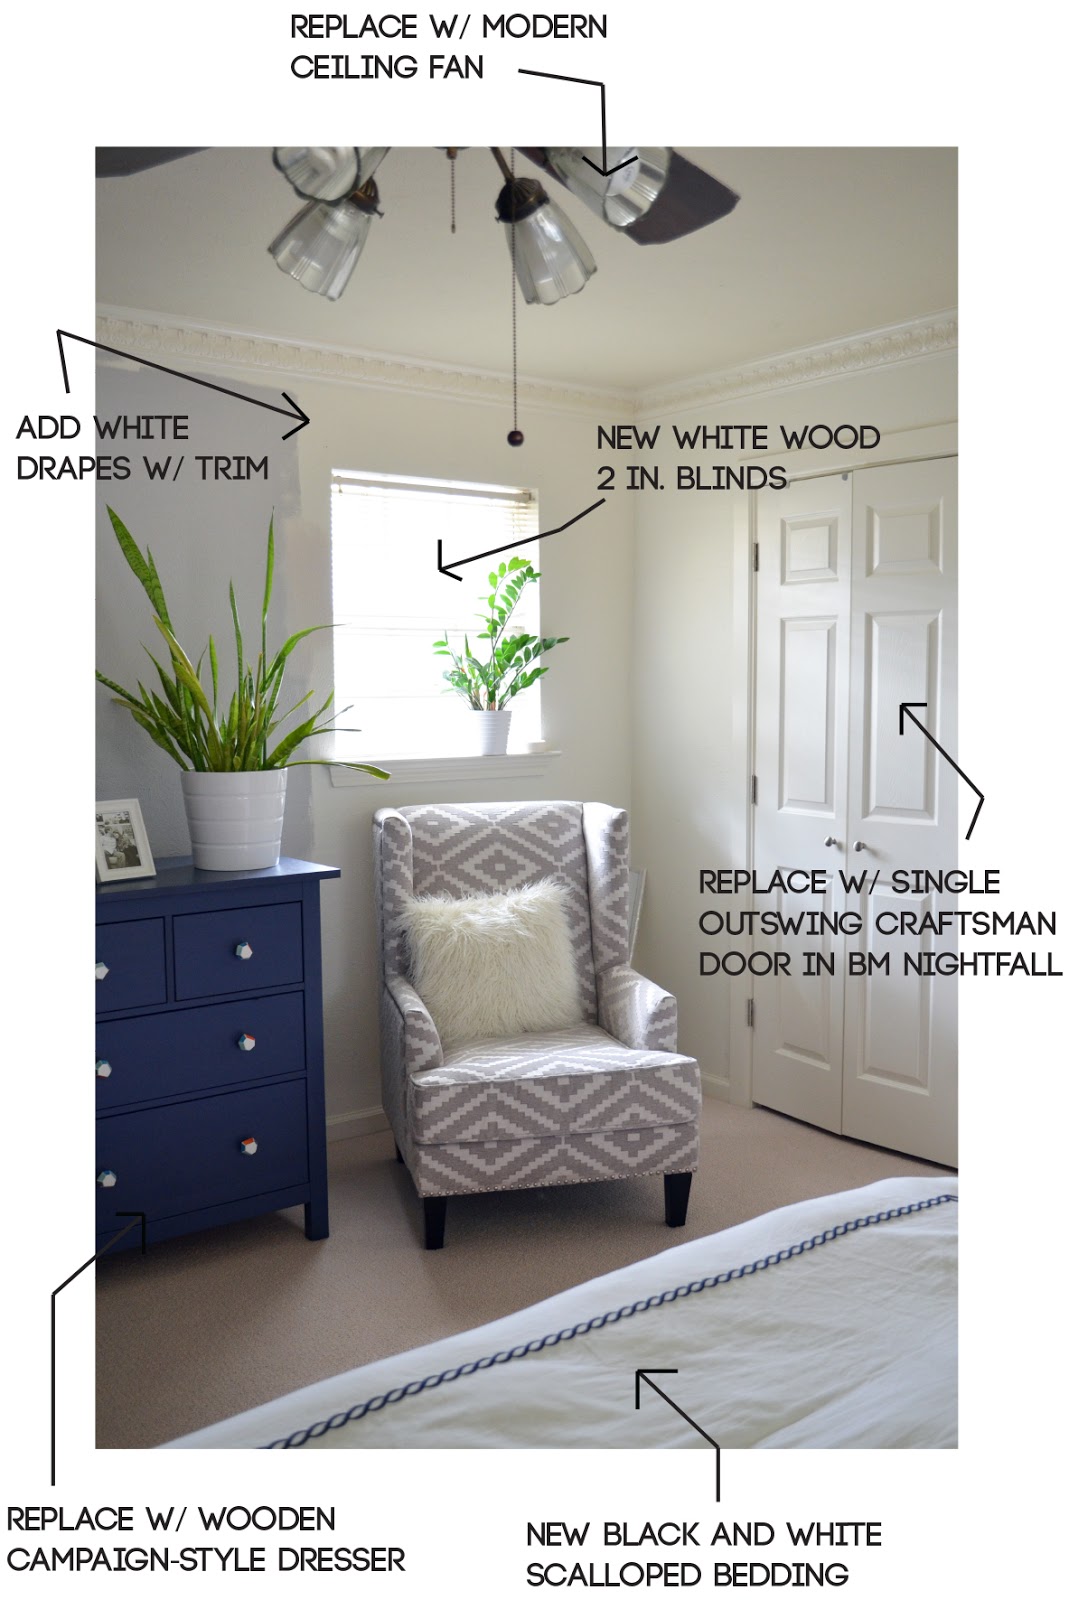
Here you can see my serious paint indecision. I originally planned to paint it BM Stonington Gray like our living room, but once I got it up on a couple of walls I realized it was going to show way too purple. Then, I went a bit lighter with BM Wickham and it felt too blue, so I totally changed directions and tried BM Athena. After I realized this was too beige I was bummed out, and went back to my inspiration images to realize I needed to paint it white. I've been wanting to paint our bedroom white for years, so BM Decorator's White it is! The ceiling and trim will be BM Super White.

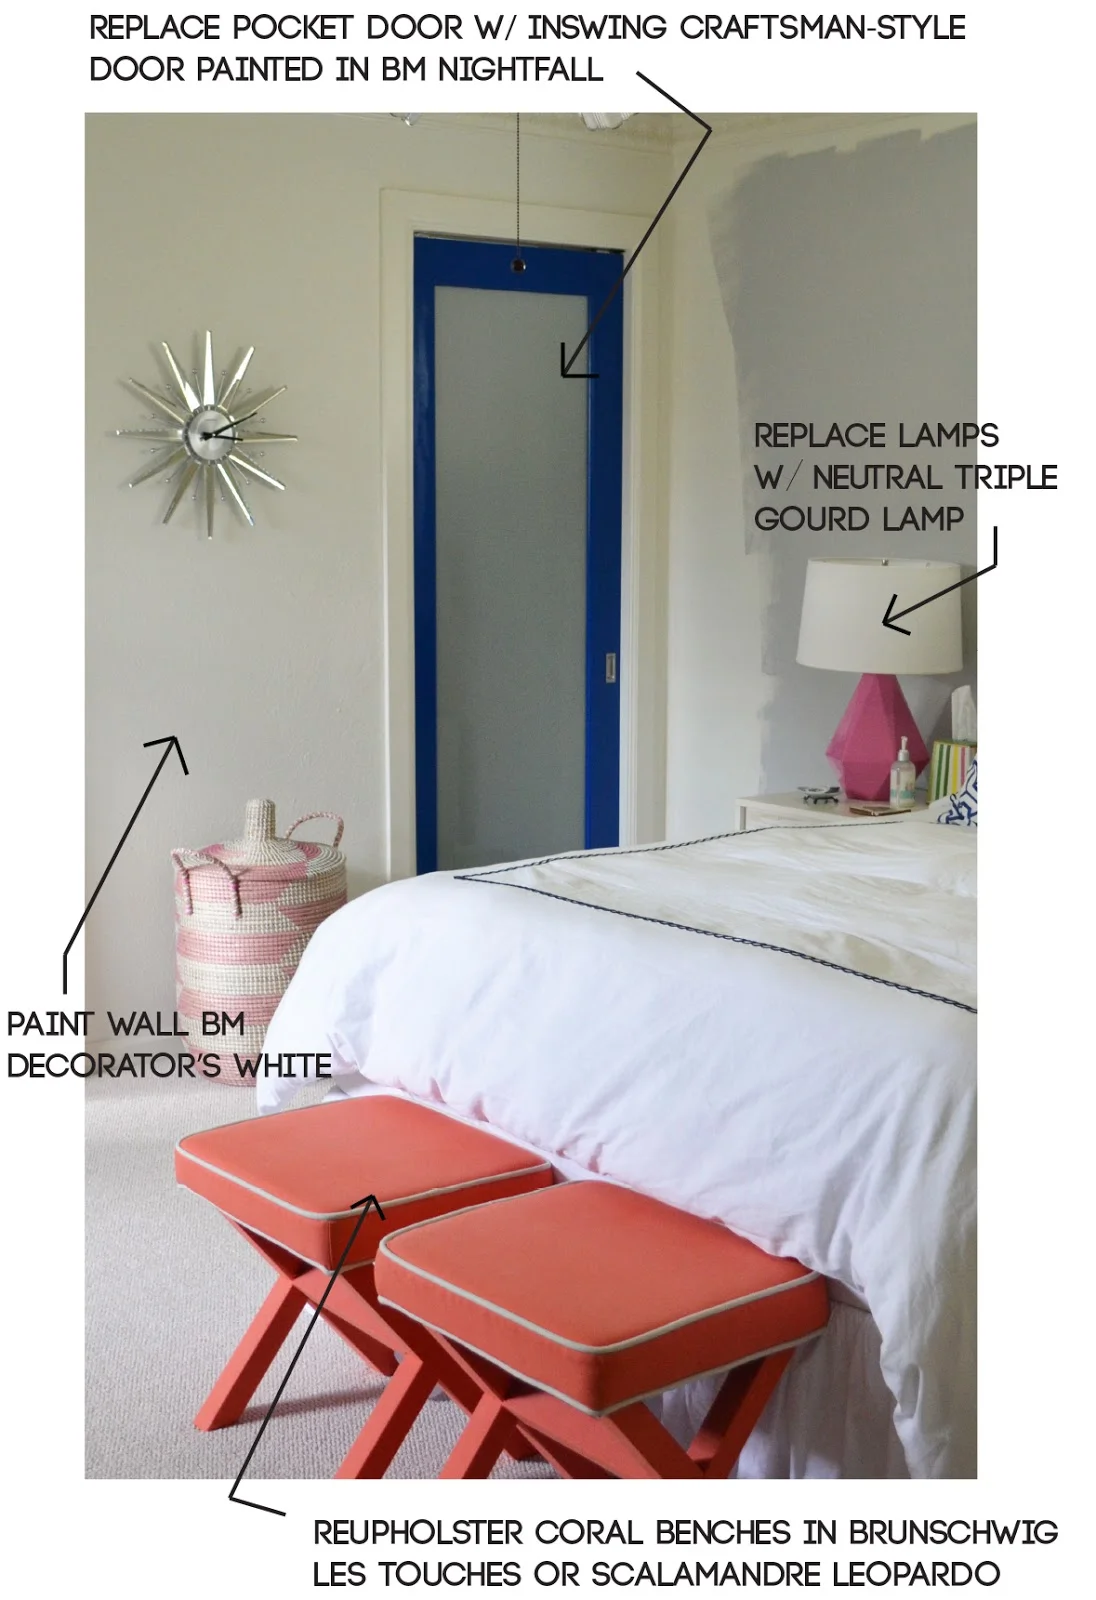
This bright blue pocket door hurts my eyes every time I look at it. Not only is it so very wrong for the space, it was installed wrong so there is a 1-inch gap at the top. The glass also makes light flood the room when you get up in the middle of the night guaranteeing that you'll wake up whoever is sleeping, so it's an all around bad design decision... and precisely why most people should to consult with a designer before making changes to their homes!

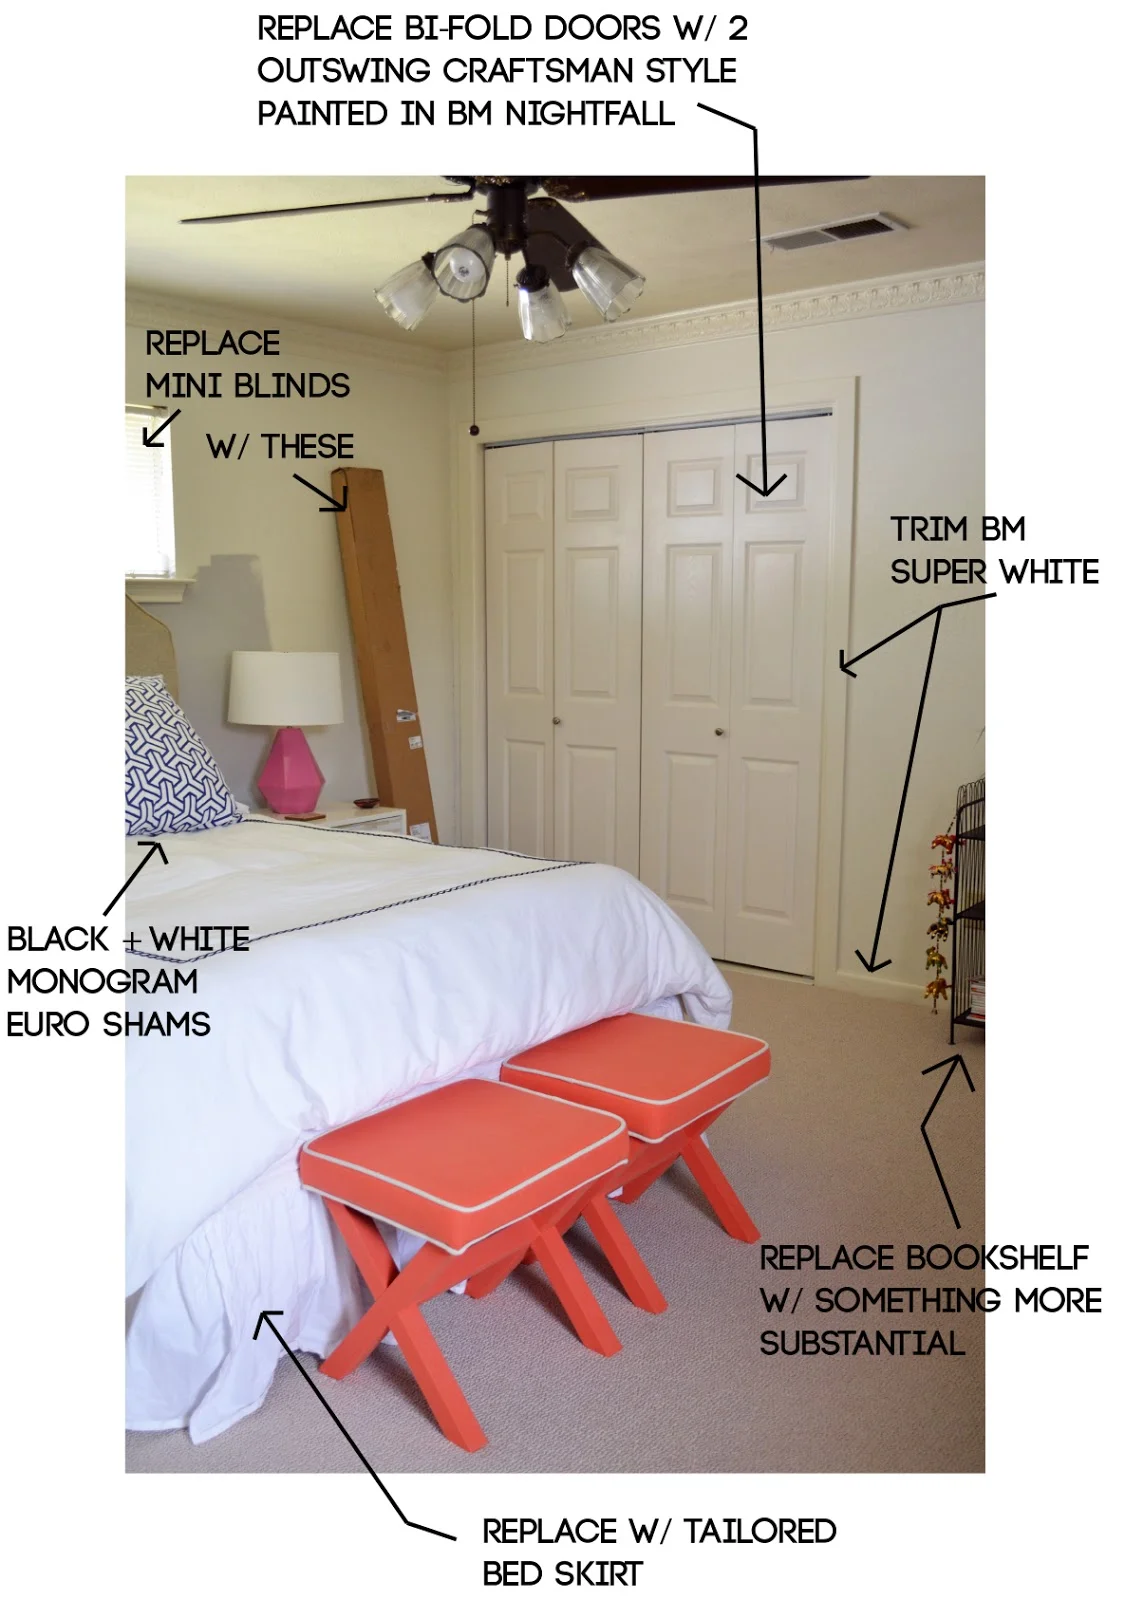
No, our walls aren't dirty, that's just the awful shade of glossy "white" they decided to paint everything. It's just so... blah and just changing this will totally change the feel of the room. We're also changing out these bi-fold closet doors to double doors similar to this.

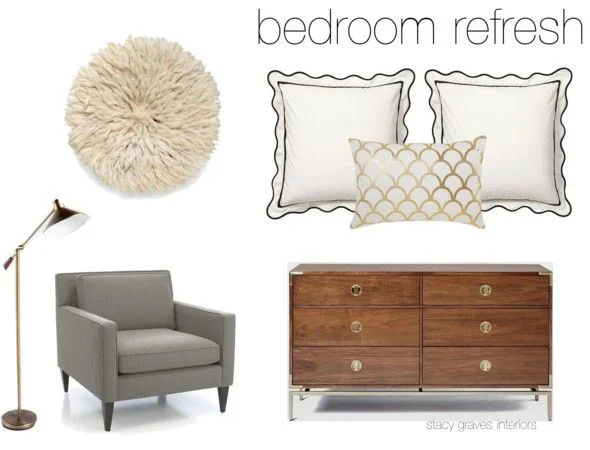
Here is a bit of my design inspiration:

While there is a lot to do, it's mostly quick fixes so I'm hoping it won't take me too long (famous last words). I'll keep you posted on my progress via instagram and share a full reveal on here as soon as it's finished!

chairish room challenge

I've been a fan of Chairish for some time when looking to score vintage and one-of-a-kind finds, so I was thrilled when they gave me the challenge to create a room based off one of their fab accent chairs. I was immediately drawn to this green velvet mid-century chair and went from there!

You guys know I'm a big fan of color, and all of my favorite finds were bright, so I combined them and went all out in this room. To balance out these strong pieces I grounded them with a neutral rug and brass accent pieces and kept the art subtle. I imagine this as a chic seating area or even a fun home office. 

What do you think? Make sure to check out their website and share some of your favorite Chairish finds!

sources:

project: easy front door makeover

Hello! Sorry for the radio silence as of late. It's been a combination of having a bunch of half finished projects that aren't ready to photograph, and being too busy to upload and edit pics of the ones that have been completed. I think I'm finally out of my funk, so today I'm going to share our super easy and affordable front door makeover! 

Our contractor put on our new door before I had time to take before photos, but when we purchased the house our entry door was a standard wooden door with a beveled glass panel similar to thisThere was nothing wrong with the original door, it just didn't fit the aesthetic that I wanted for the house, so we replaced it with a steel craftsman style door
I debated for a long time on whether or not I wanted a door with a window, but ultimately decided I'd rather have the privacy. To make up for the lost light in the entryway, Charlie and I installed (ourselves!) a new storm door and love it. 
It had been hanging unpainted and damaged for three months (the installers put a big dent in it when they installed it, and it took this long for our contractor to fix it!) so we were anxious to give it a makeover. We chose to paint it Night Fall by Benjamin Moore to match our newly painted beams, and we replaced the hardware with this modern lockset by Schlage and these house numbers from Home Depot.
Our new house numbers were the easiest and cheapest part of the makeover, and I think they're my favorite change. Instead of putting a bunch of holes in our new door (and spending a lot of time worrying about everything being perfectly centered and leveled) I just attached two strong magnets to the back of each with Gorilla Glue, and used the magnets to attach the numbers to the door! It took me only a few minutes and completely transformed our door to the modern look I was going for!

We still have to finish painting, and I'm waiting for my new console and light fixture to arrive before I share final photos of the entryway. Stay tuned!