how we updated our kitchen cabinets

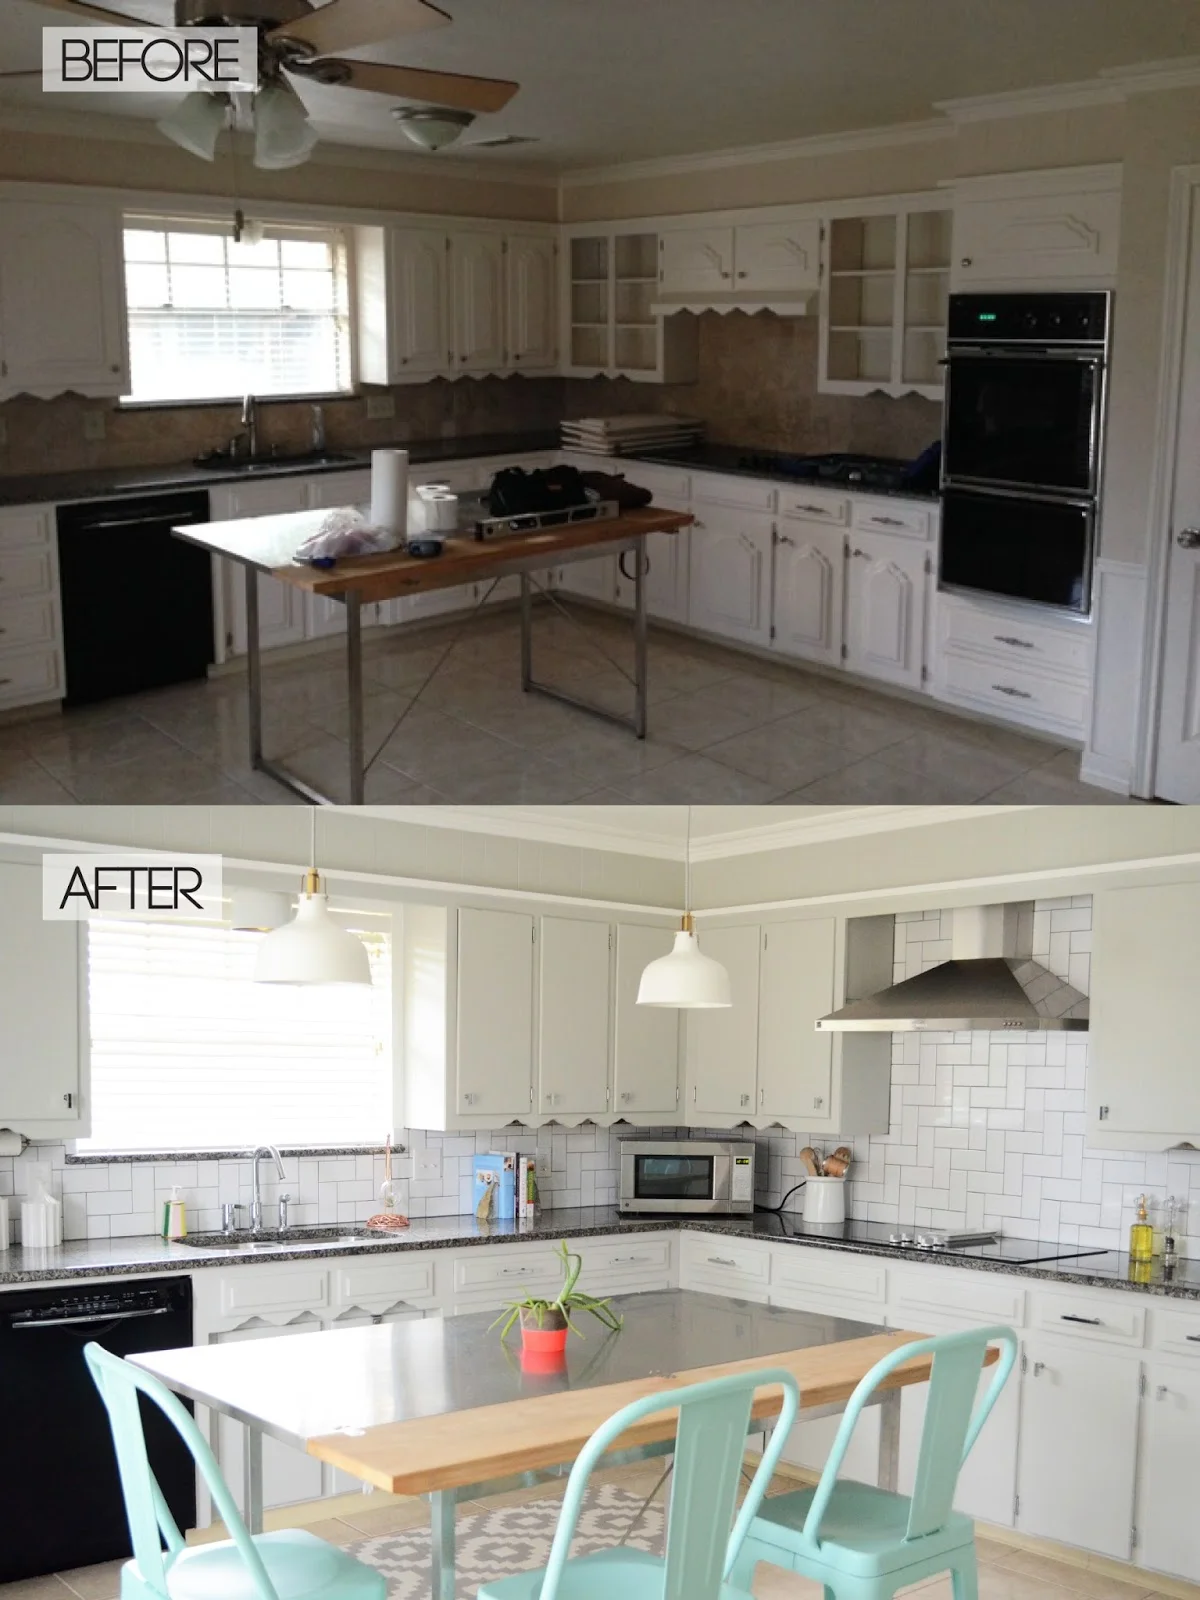
I've had a lot of questions about how we updated our kitchen cabinets, so I figured I would share in a blog post!

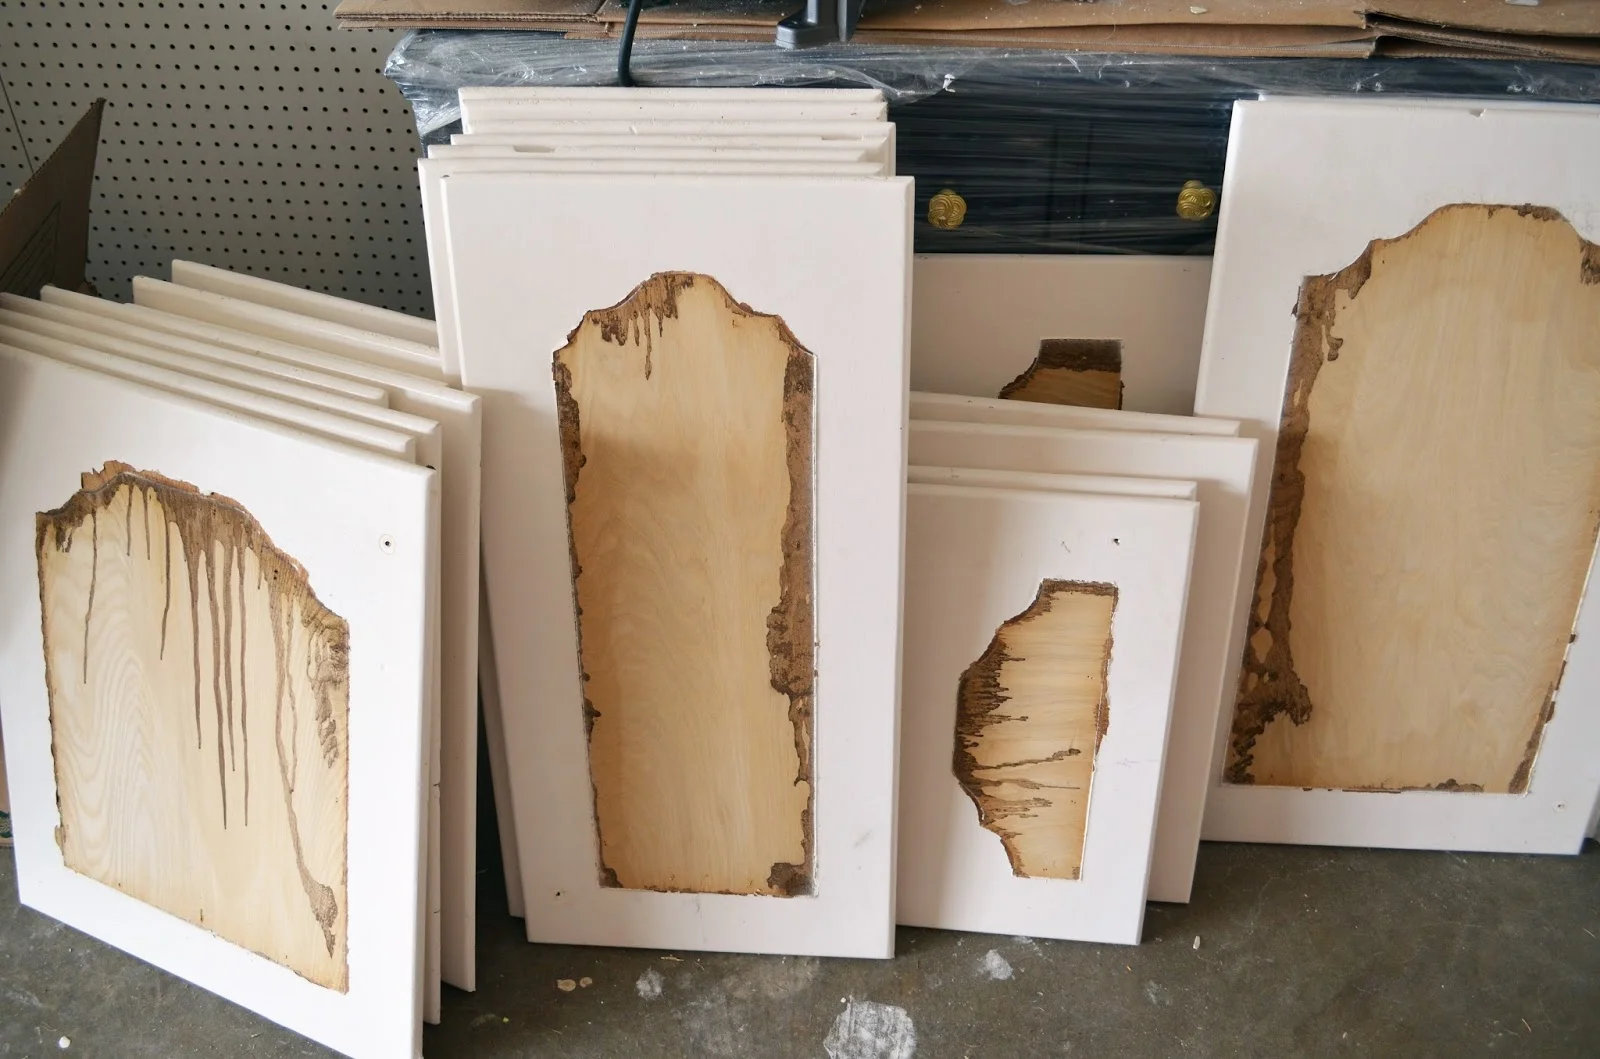
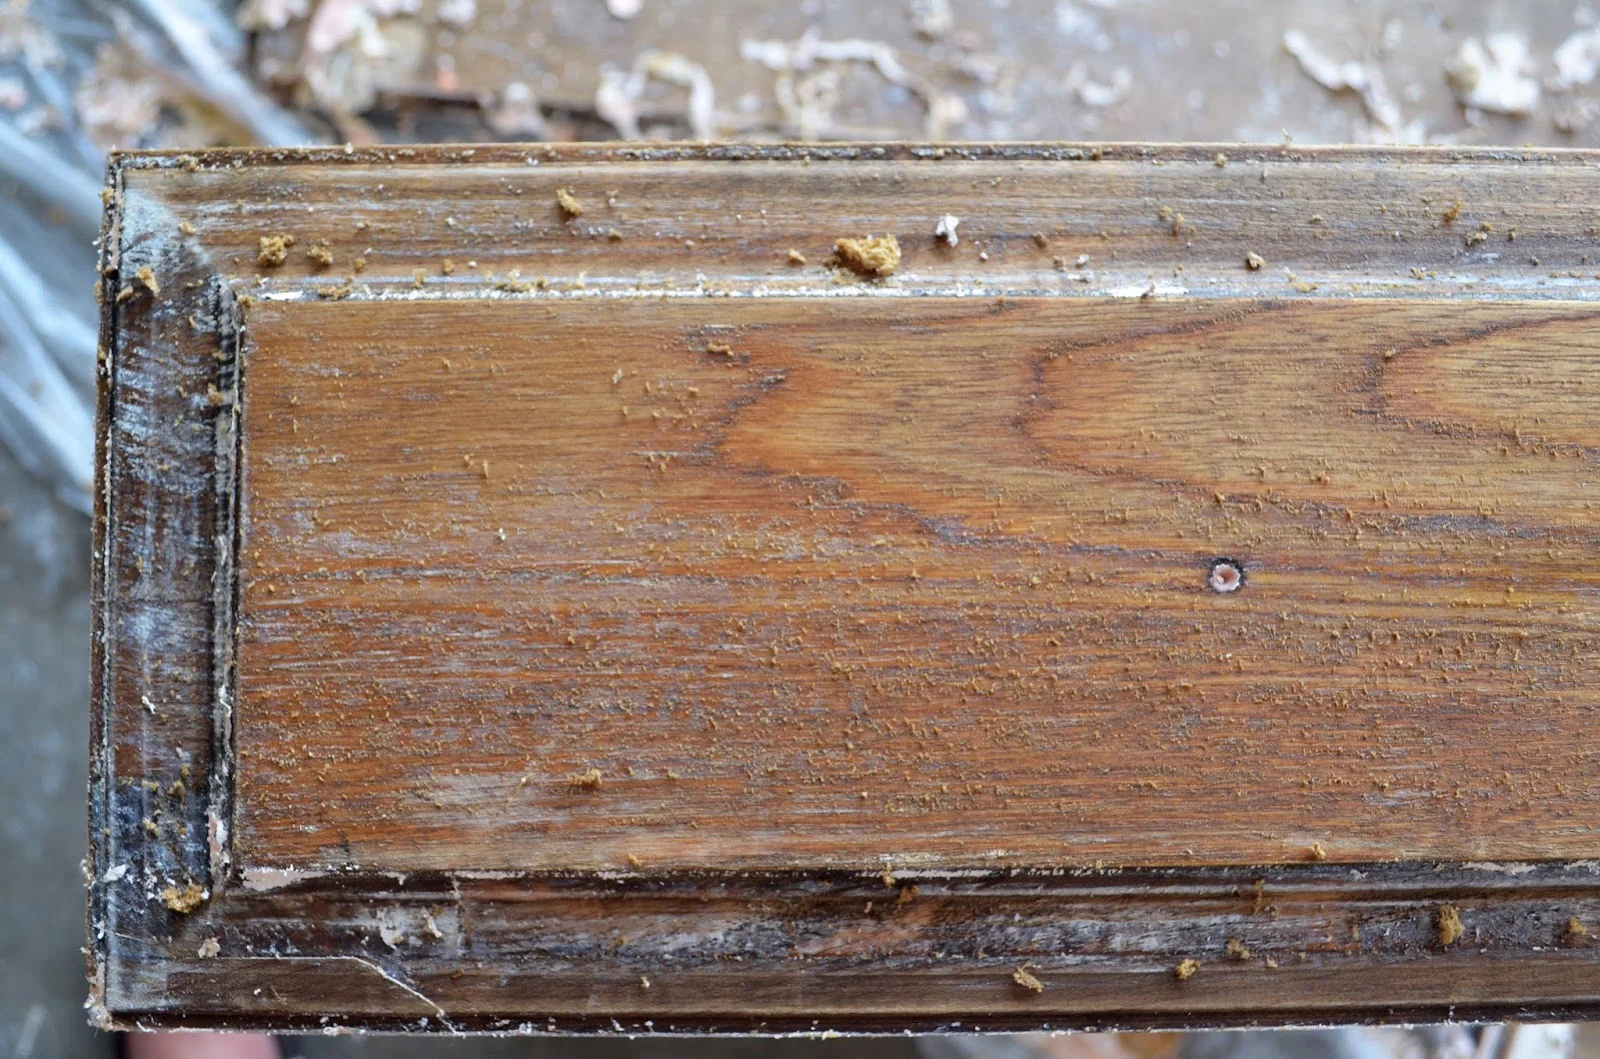
The truth is, I actually sat on it for awhile before figuring out what I wanted to do. I knew I didn't want to sand down and paint the cabinets as they were. The detailing on the front made them look dated and heavy, and they were going to be a nightmare to sand. I looked into possibly getting new doors, but quickly ruled that out due to cost - We're only staying in this house for a few years, so I didn't want to invest that kind of money on something where we wouldn't see a return. After thinking about it for a few weeks, it occurred to me that the detail was probably only an attached panel and not actually carved into the wood, so I had Charlie try to pry one off, and it worked!

At this point I thought they would be a breeze to sand since they were now flat and I only had to get around the edges, but I was so very wrong. They were painted with multiple coats of oil based paint, and since oil paint dries so hard, the sander wasn't making much of a dent. At this point I was pretty bummed because I try to avoid using paint stripper whenever possible. It smells, it's not very safe, and it's a mess to use. I checked out my options at Home Depot and found Citristrip, which was supposed to be a safer alternative to paint stripper, and decided to give it a try. 

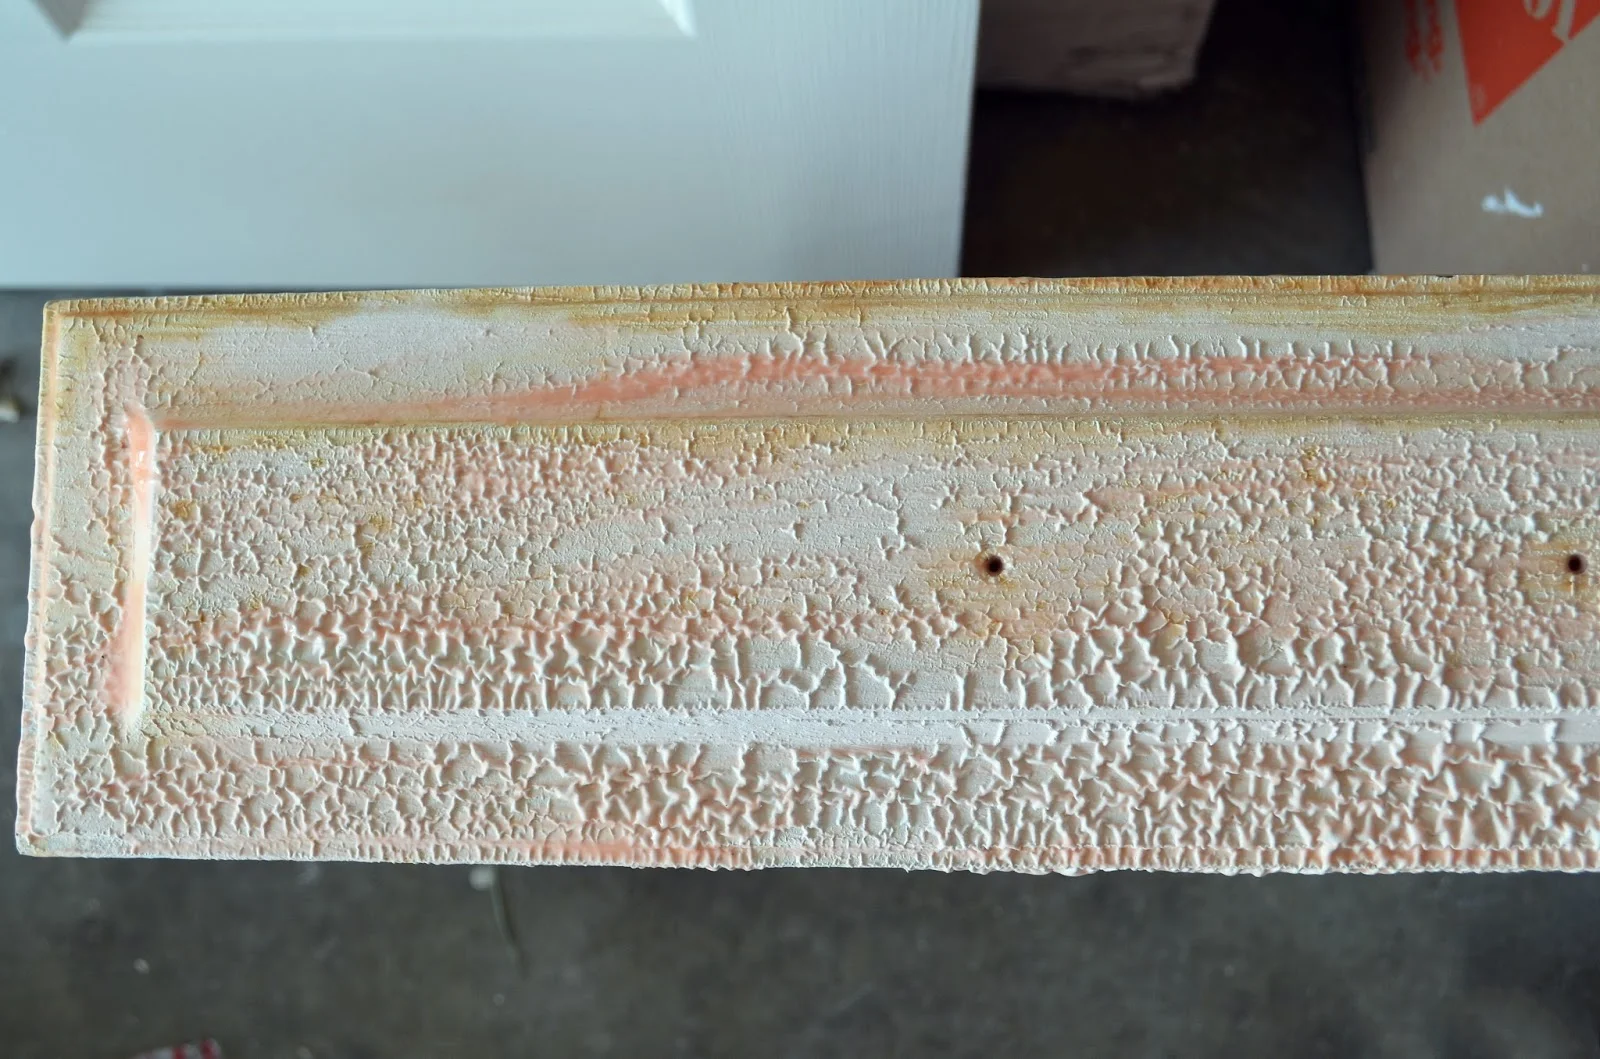
I still used gloves during the application, but even when I accidentally got it on my skin it didn't burn. We were also excited that we didn't have to wear masks like we would if using other toxic strippers. We painted on a pretty think coat (I would describe it as the consistency of icing), and let it sit for about 30 minutes until it looked bubbly.

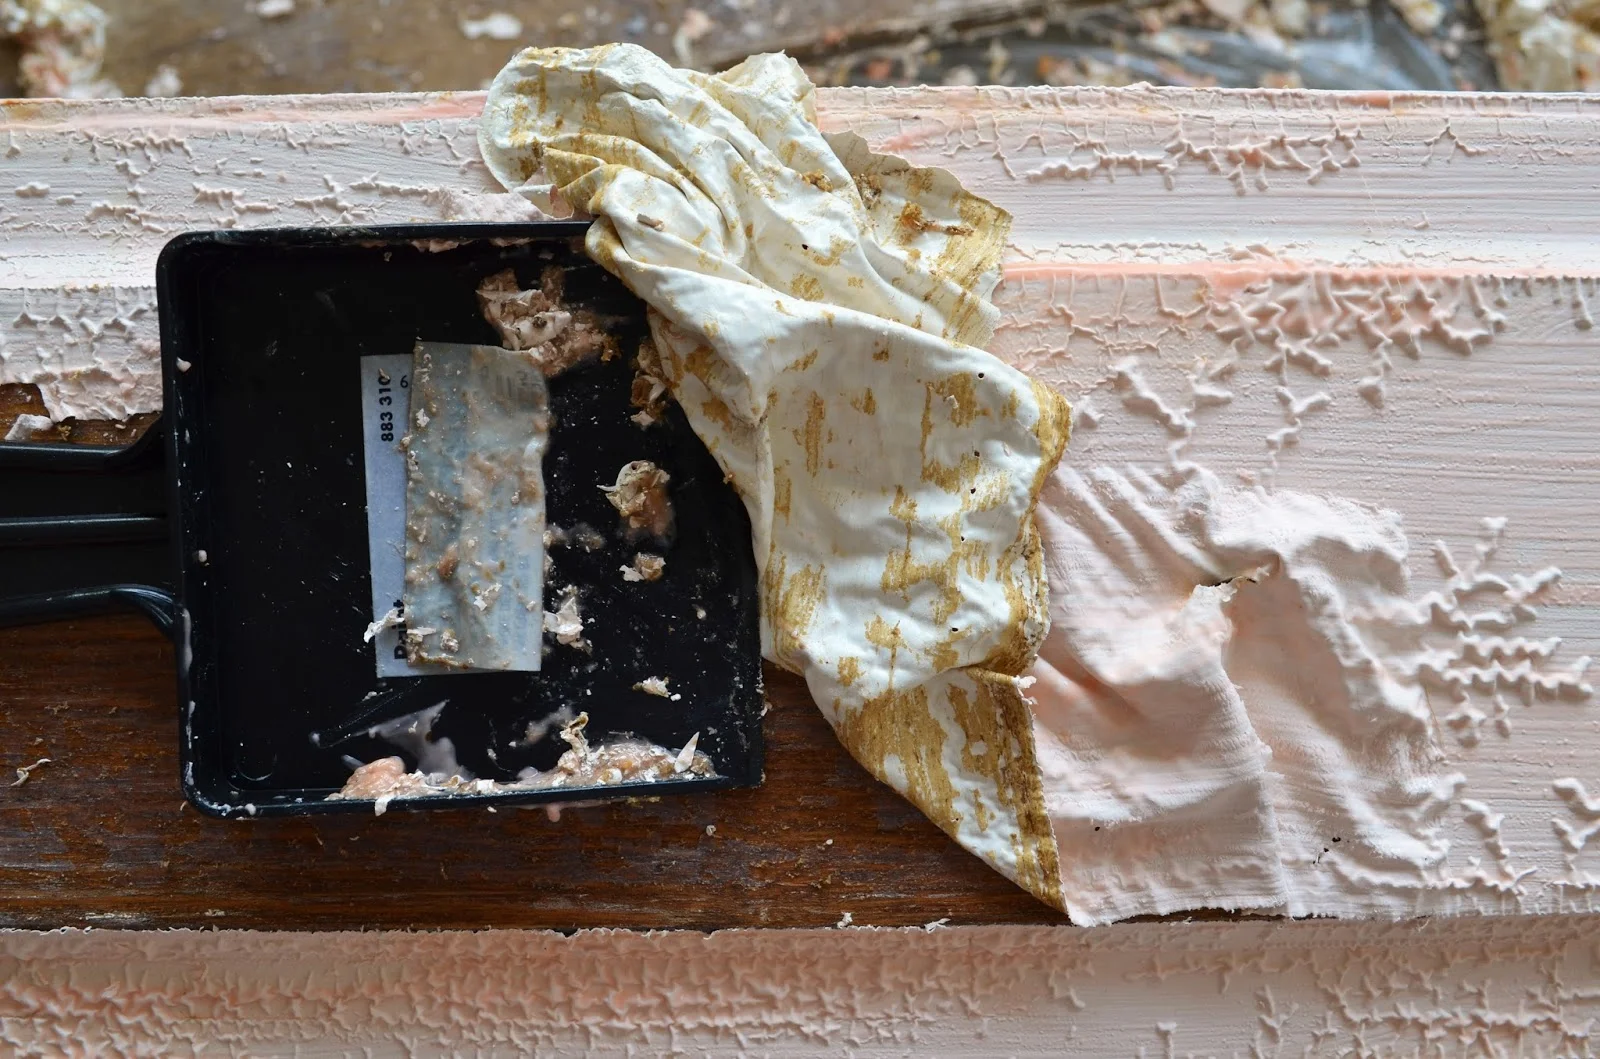
Going with the grain, use a paint scraper and most of it should come off in one swipe. If it doesn't come off easily, paint on another thick coat, let it sit, and then try again. The key is putting on a thick coat, and not letting it sit too long. We found if it sat too long it dried out too much and flaked off making it difficult to remove.

After removing most of the paint we still had a lot of residue, so we used odorless mineral spirits to clean it up, gave it a good sanding, and then it was ready for primer and paint. This was definitely a time consuming and messy process, but we were able to complete it in about 3 days. It will take a long time before you can convince me to do it again, but we saved thousands of dollars by refinishing the cabinets ourselves and not hiring the job out.

Here are a few tools that we found very useful in the process:
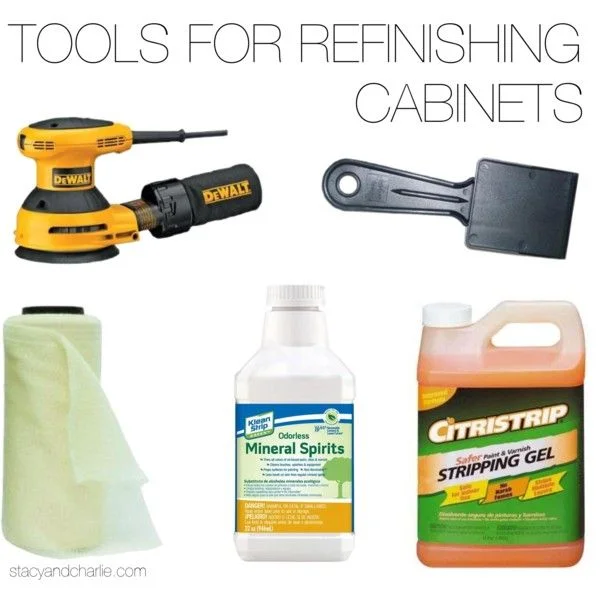
>>orbital sander<<

>>paint scraper<<

>>tack cloth<<

>>odorless mineral spirits <<

>>stripping gel<<

If you want to see our full kitchen update, make sure to check outyesterday's post!

diy fluffy ribbon for packages

As promised, here is a ribbon tutorial for the Christmas packages you wrapped yesterday!

 1 | Start by folding in half a piece of ribbon slightly larger than you want your bow.

 2| Fold ribbon around to other side, and continue until you have done at least four folds (two on each side).

3|  Once you've wrapped the ribbon around at least four times (more for a fuller bow), cut the ribbon.

4| Staple the center of the ribbon to hold in place.

 5 | Cut a piece of ribbon to fit around your package.

6 | Staple ribbon at top and bottom to hold in place.

 7 | Place your folded ribbon perpendicular the ribbon you placed on the package and staple once to hold in place.

 8 | Cut another piece of ribbon to wrap around your bow. This will hide the staples you have used

 9 | Pull ribbon taut. This will also rotate your bow around to the correct spot on your package.

 10 | Cut the ends of your ribbon to the same length.

 11 | Fluff up your pretty bow!

This method works best with wire ribbon so you can get a big, full bow. What I like most is that it takes very little time, and by using the stapler to hold it in place instead of your fingers, you don't have to ask anyone for help while tying! 

If you need to see the

tutorial in action

, or tips on how to wrap a package, don't forget to check

yesterday's post

. Let me know how this works for you, and I'd love to see pictures of those pretty packages you've made!

how to quickly wrap a pretty package

If you still have wrapping to do, you're in luck because I've put together a simple tutorial on how to quickly wrap your gifts! I have recently created a YouTube channel that I plan to start using to create tutorials on styling and other DIY projects that I will be blogging about in the new year, so to start it off, I experimented with a tutorial for you to see the steps listed below in action!

1 | Start by folding one side, ensuring there is enough left on the other side to completely cover the back side with about 1 inch overhang.

2 | Fold over other side, creasing at overhang. This creates the seam on the edge and not in the middle of the package!

3 | Pull taut and tape seam along the edge.

4 | Turn package to one side. Fold over left side pulling taut, and tape. 

5 | Fold and tape down excess paper at corner.

 6 | Pull other side taut, crease, and tape.

 7 | Crease corners of one side to make them crisp.

 8 | Fold flap and tape. 

 9 | Make corners crisp on other side.

10 | Fold under edges of flap to make even and crisp, tape.

11 | Repeat same steps for folds on opposite side.

12 | crease edges with index finger and thumb to make crisp.

13 | Put a bow on it!

 This sparkly bow takes less that a minute to make, and I'll have a tutorial coming tomorrow! Stay tuned!