Almost daily I am receiving design questions from people with projects that aren't big enough to justify hiring an interior designer, but they still would like a designer's advice before proceeding with a purchase. Other times they know what they need, but they just want help finding the right pieces in their budget. When I searched for a solution, I found people have very few options for when they want to consult with a designer, but don't need to actually hire an interior designer. My answer to this problem: $20 Quick Design Fix℠!
Here are a few examples of what you will get with a Quick Fix.
This client needed help finding a 9' x 12' rug that was under $1,000 and also fit into her existing living room decor.

This client was having trouble finding affordable and attractive storage for her open bathroom shelving.

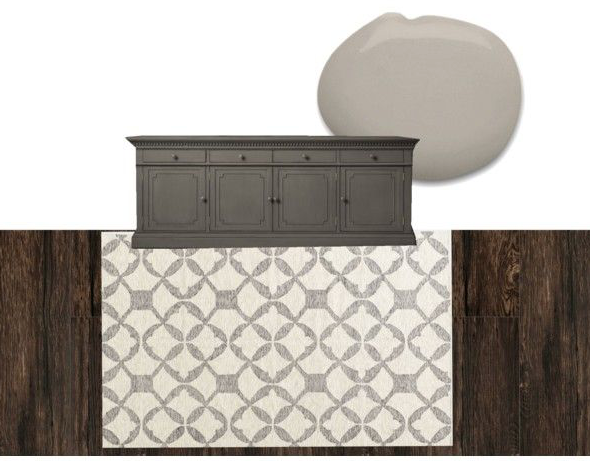
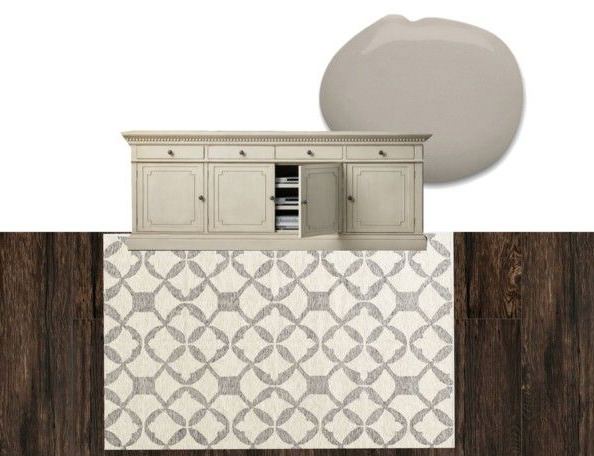
This friend had her paint color and rug picked, but wanted help deciding between finishes for their TV console:
Other examples of questions that would qualify for a Quick Design Fix℠ are:
"What pillow combinations would work with my sofa?"
"What type of drapery do you recommend for my nursery?"
"What are some neutral-toned gray paint colors I can try?"
I've been cleaning up my website to make it easier to navigate and find what you need. You can
check it out here, and find the $20 Quick Design Fix℠ here, as well as from the link at the top of this blog! To kick off my new service I'm giving away TWO free Quick Fixes to my readers. All you have to do is make sure to follow me on Instagram and like today's Quick Fix post! For extra entries tag a friend in today's instagram post that might be interested in a Quick Fix for their home and visit my other social media sites via Rafflecopter below. You have until next Friday, March 27th to enter!
UPDATE: Winners are Sarah Cotton and Kristin Kriegler. Please e-mail me at [email protected] to claim your prize!